

Vue Single-file component for Meteor
Compatibility: Vue 1.x, Vue 2.x
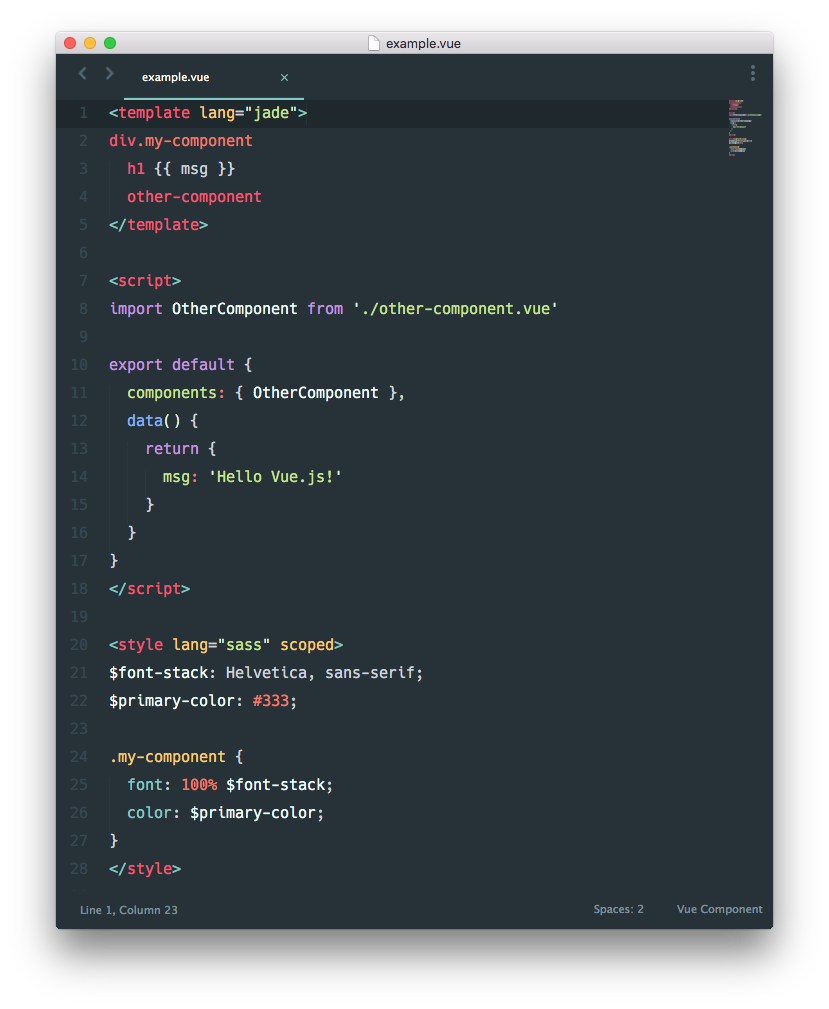
It allows you to write your components in this format (with hot-reloading support):
Installation
meteor add akryum:vue-component
Usage
Babel cache
The babel cache folder defaults to .cache, but you can override it with the BABEL_CACHE_DIR environment variable:
cross-env BABEL_CACHE_DIR=cacheFolderName
Hot-reloading
To enable component hot-reloading, make sure that you launch meteor in development mode (typically with meteor or meteor run). The server console should print this line:
Dev server (vue-components) listening on port 3003
Your browser console should also output:
[HMR] Vue component hot reload shim applied.
Dev client connected
Now, whenever you save a component file, it will be instantly updated on all the connected clients.
By default, the package will try to use the Meteor port + 3, but you can override the port used by the hot-reloading server with the HMR_PORT environment variable:
cross-env HMR_PORT=4242
You can disable HMR with the NO_HMR var:
cross-env NO_HMR=1
Remote devices
If you have an issue with HMR not connecting from remote devices (e.g. styles are not loading), set the HMR_URL env. variable with the IP of your computer. For example:
cross-env HMR_URL=192.168.1.42
File structure
The component file must include:
- Maximum one
<template>tag containing the template html of your component, - Maximum one
<script>tag containing the component options object in javascript, - And as many
<style>tags as you wish.
You must export your code with the ES2015 statement export default in your <script> tag:
1<script>
2// ES2015 Javascript with support for import statements
3// See the 'ecmascript' meteor package for more info
4export default {
5    ready() {
6        console.log('Hello world!');
7    }
8}
9</script>
Scoped style
By default, the css added with <style> tags will be applied to your entire app. But you can add the scoped attribute to any <style> tag in your component file so that the css is only applied to this specific component:
1<style scoped>
2/* Will only be applied to this component <a> elements */
3a {
4   color: red;
5}
6</style>
CSS Modules
As an alternative to scoped styles, you can use CSS modules to scope your CSS to your components by adding the module attribute to any <style> tag in your component file and accessing the styles via the $style property:
1<style module>
2/* Will only be applied to this component <a> elements */
3.red {
4   color: red;
5}
6</style>
7
8<template>
9  <div :class="$style.red">Red Text</div>
10</template>
11
12<script>
13  export default {
14    created() {
15      console.log(this.$style.red);
16    }
17  }
18</script>
By default, your styles will be assigned to the $style computed property. You can customize this by setting the module attribute. This also allows you to create multiple "modules" in one component file:
1<style module="foo">
2  .color {
3    color: orange;
4  }
5</style>
6<style module="bar">
7  .color {
8    color: purple;
9  }
10</style>
11
12<template>
13  <div :class="foo.color">Foo Text</div>
14  <div :class="bar.color">Bar Text</div>
15</template>
Note: composing from other files is not supported by the built-in CSS modules processor. See the community packages.
Language packages
Using the power of preprocessors, you can use a different language (like less or jade) by adding a lang attribute on your <template>, <script> or <style> tags.
Packages for <template> tag:
Packages for <script> tag:
Packages for <style> tag:
- akryum:vue-less
- akryum:vue-sass
- akryum:vue-stylus
- nathantreid:vue-css-modules enables interop with nathantreid:css-modules, including support for composing from other files.
Get involved! Add your own package with a PR! :+1:
JSX
To add JSX support, install the following packages:
meteor npm i -D babel-plugin-syntax-jsx babel-plugin-transform-vue-jsx
Then add a .babelrc file in the root directory of the meteor project with the following content:
1{
2  "plugins": [
3    "transform-vue-jsx"
4  ]
5}
You can now use JSX in your Vue components:
1<script>
2export default {
3  render (h) {
4    return <div class="home">
5      <h1>#404</h1>
6    </div>
7  }
8}
9</script>
Manual import
You can then import your .vue component files in your meteor code:
1// Post
2import Post from '/imports/ui/Post.vue';
3Vue.component('post', Post);
Automatic components registration
.vue files outside of the imports directory are automatically registered as custom tags. The default tag name is the name of the file in kebab-case, and you can set your own with the name attribute in the component options.

In the example above, the Post.vue component is automatically available in your vue templates as <post>.
You can override the default naming behavior by setting the name option in your component:
1<script>
2export default {
3  name: 'selected-thread',
4  // other options...
5}
6</script>
Here your component will be available as <selected-thread> regardless of the file name.
Package name
If your component files are in a package, they will have the packageName attribute set. You can access it in your component instances like this:
1let packageName = this.$options.packageName;
It will be null if the components is in your application code.
Ignore files
You can create .vueignore files with a RegEx on each line to exclude .vue files from the compilation based on their path. If the .vueignore is inside a folder, it only applies to that folder.
For example, you can add the following .vueignore file to your app inorder to ignore .vue files in the node_modules folders:
node_modules/
Using Vue npm packages
Most of the time, you need to ignore the compilation of Vue files inside the node_modules directory.
Add a .vueignore file in the project root with the following content:
node_modules/
The npm packages should have distribution/compiled files (or try to tell their authors if they are missing). You should directly import these if you have any issue.
For example, to use the keen-ui package, install the plugin in your app using the dist files:
1import 'keen-ui/dist/keen-ui.min.css'
2import KeenUI from 'keen-ui/dist/keen-ui.min.js'
3Vue.use(KeenUI)
Next steps
LICENCE ISC - Created by Guillaume CHAU (@Akryum)